Pork crackling on the kamado
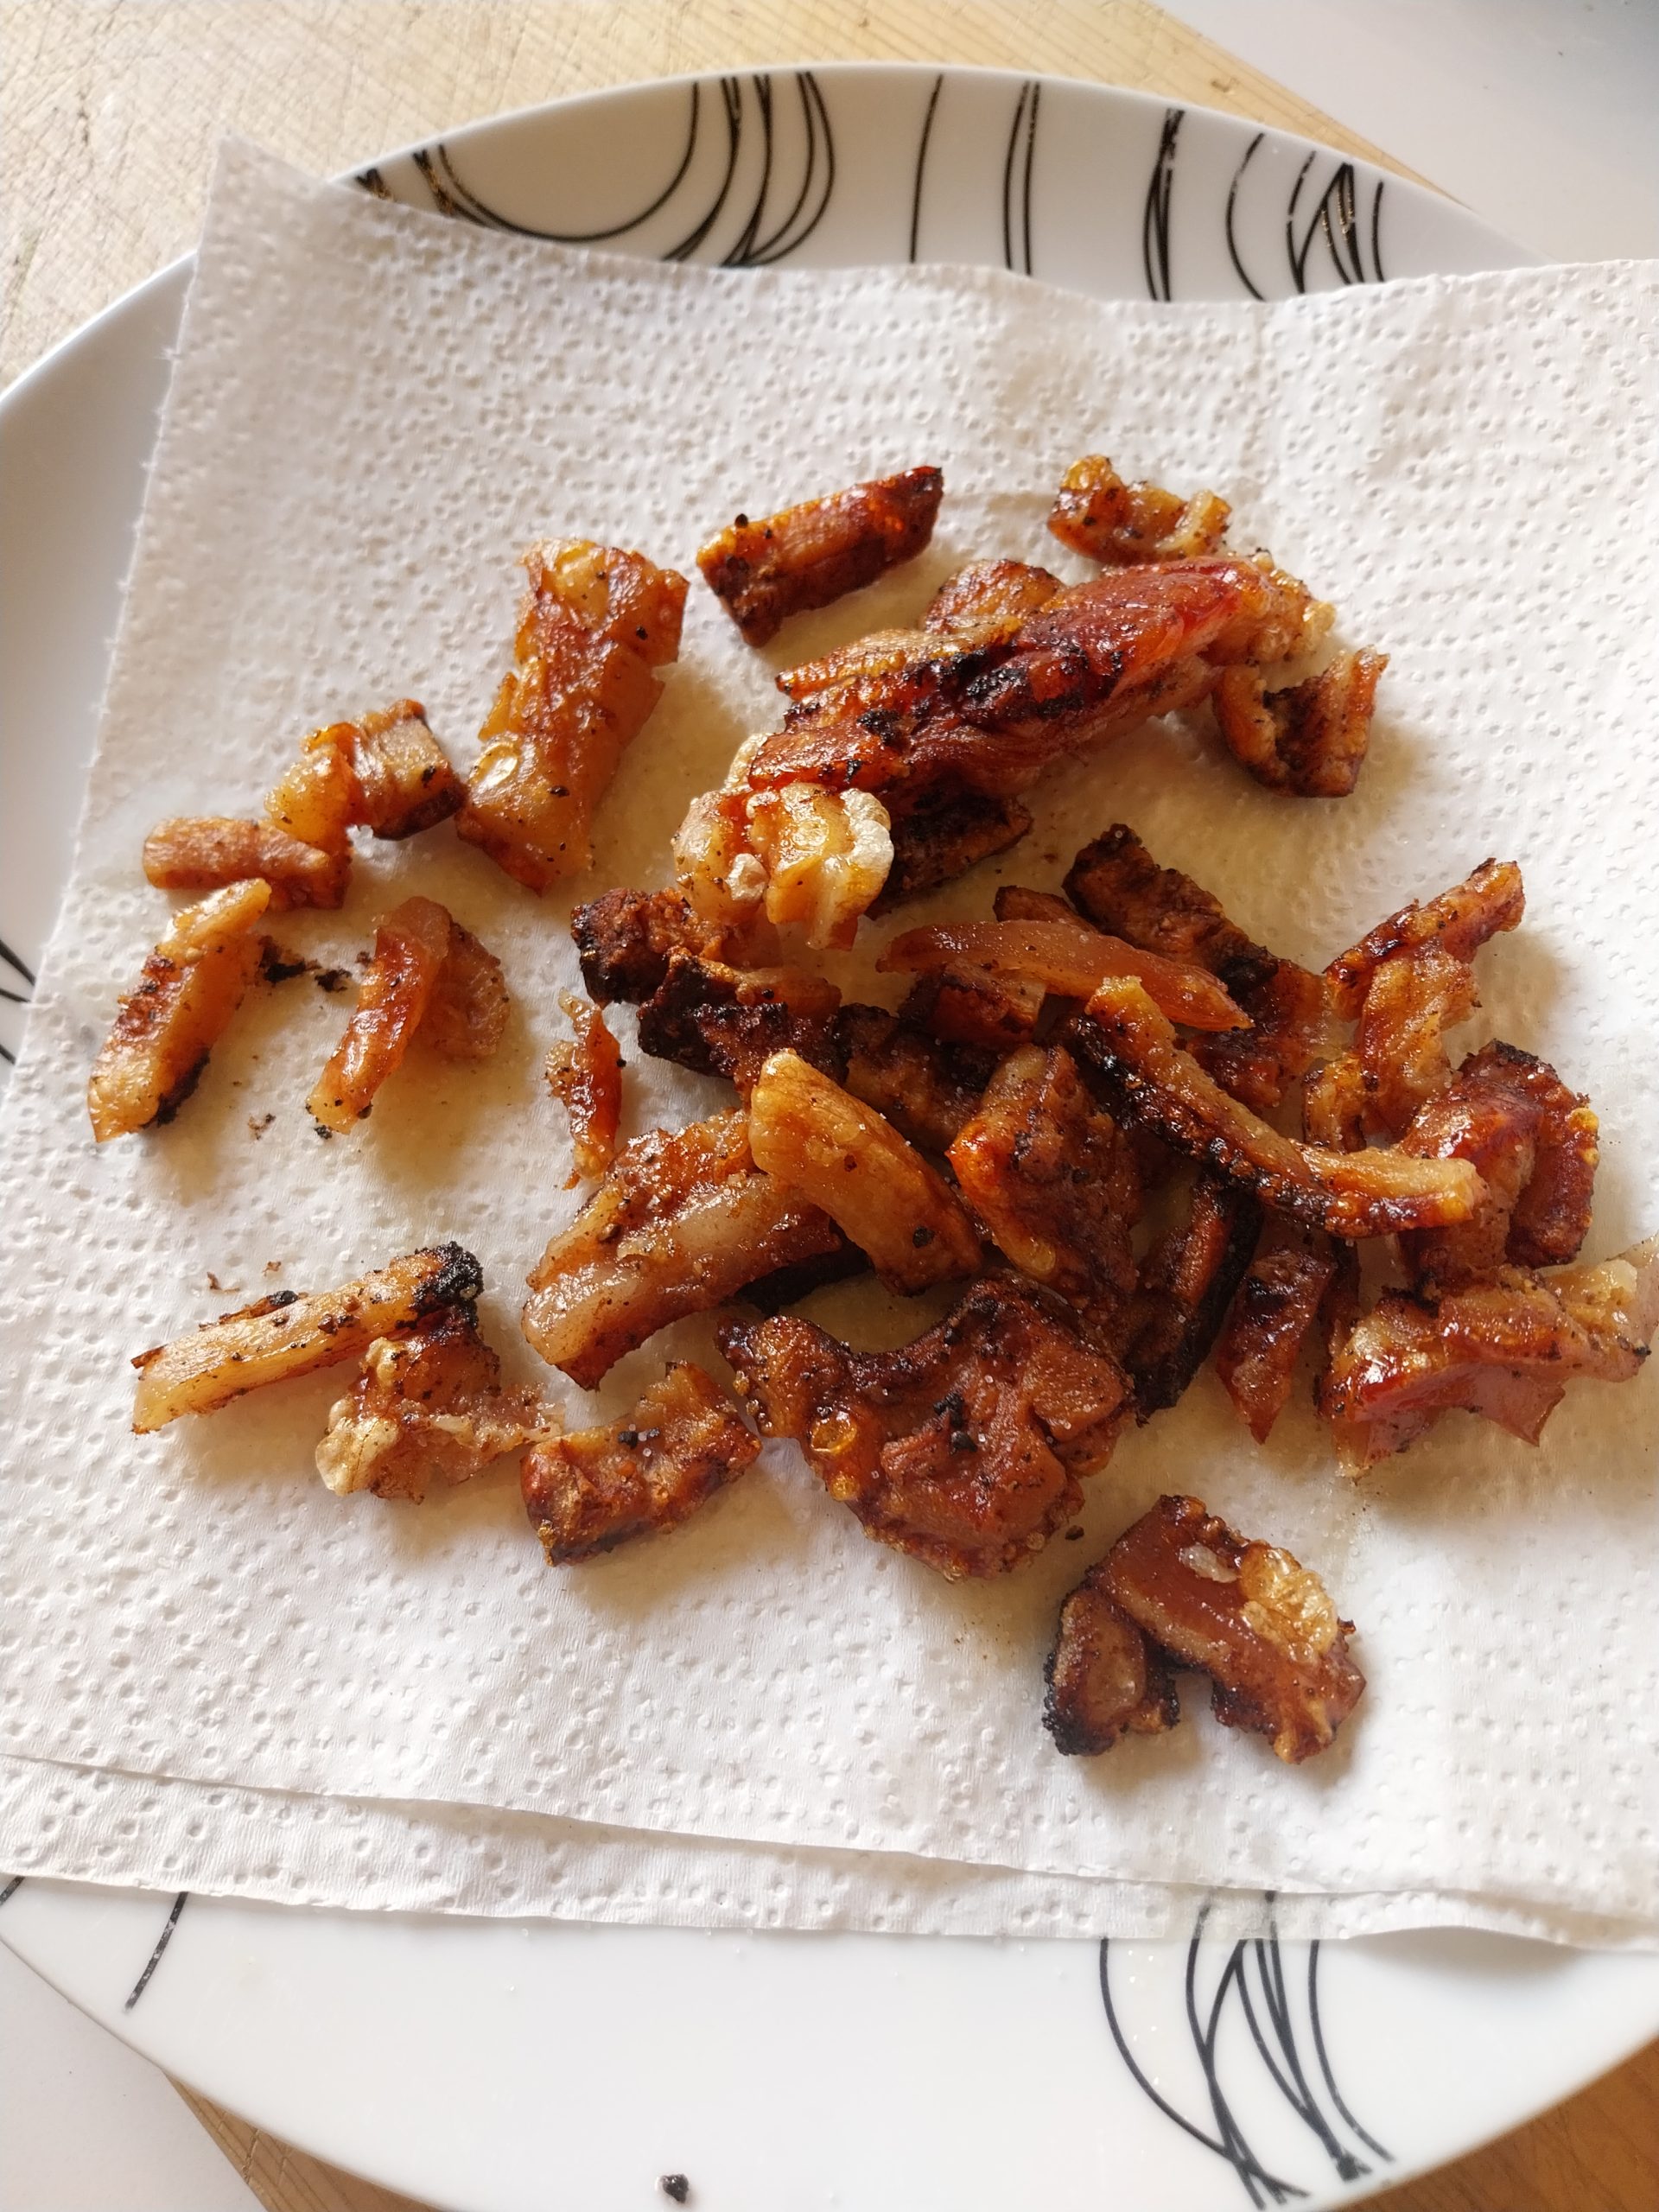
Pork crackling on the kamado
Published 9 May 2026 · Last updated 9 August 2026 · Tested by Ben Austen · Affiliate disclosure
Bite-size pork crackling rendered on a kamado, in its own fat, in a foil-lined baking tray. I knife-dice the skin off a pork loin, leave it alone in the tray at 140°C while the rest of the cook happens around it, and pull it out roughly 70 minutes later. Every cut edge is exposed surface area, every piece is one bite, and the head-rattle when you eat it is the real thing.
Key takeaways
- Bite-size pork crackling, knife-diced, self-renders in its own fat — no separate tallow, oil, or drippings need to go in the tray.
- Cook spec: ~70 minutes at 140°C when you’re parallel-cooking the crackling alongside a chicken and pork loin (the practical setup), or ~50 minutes at 160–175°C if it’s the only thing on the kamado.
- Table salt for the finish, not Maldon flakes — the smaller crystals stick to the crackling surface where the coarser flakes don’t.
- Use a knife, not scissors — pork loin skin is firm enough to cut cleanly with a knife. Save the scissors for pork belly fat where the softer material genuinely benefits.
- Serves: however much skin came off the loin. There’s never enough.
At a glance
| Spec | Detail |
|---|---|
| Prep time | 10 minutes |
| Cook time | ~70 minutes (parallel cook) or ~50 minutes (solo cook) |
| Total time | 80 minutes |
| Servings | 4–6 as a bar snack |
| Method | Kamado (or any 46cm-class ceramic kamado) |
| Temperature | 140°C parallel-cook, or 160–175°C solo |
| Difficulty | Easy |
| Equipment | Kamado, ConvEGGtor (heat deflector), sturdy baking tray, foil, sharp knife |
| Cuisine | British / kamado |
What you’ll need
Equipment
- A kamado-style barbecue. I cook this on my Big Green Egg Large, but any 46cm-class kamado will work — the principle is indirect heat at moderate temperature with the tray sitting on top of the heat deflector.
- ConvEGGtor (the BGE-branded ceramic heat deflector) or whatever the equivalent indirect-cook accessory is on your kamado. Without one of these you can’t run indirect heat, which is the whole point.
- A sturdy baking tray (nothing delicate — this is going on a kamado for over an hour). A standard metal tray works fine; I repurpose a baking tray I’ve kept aside for kamado use rather than my best roasting tin.
- Aluminium foil to line the tray.
- A sharp kitchen knife. Scissors are not required — the firmness of pork loin skin doesn’t need them.
- Kitchen paper for draining.
Ingredients
- The skin from a 1.5 kg pork loin (roughly 200–300 g of skin once removed), brined alongside the loin as part of my pork loin recipe. The brine + dry-finish that the loin goes through prepares the skin for the crackling cook — no separate prep needed if you’re already doing the pork loin recipe.
- Table salt, ~1–2 teaspoons, for the finish while the crackling is hot.
- Freshly ground black pepper, optional, to mix with the finishing salt if you like a peppered crackling.
The cook method
1. Remove the skin from the brined and dried pork loin
After the loin has been through its 24-hour brine and overnight uncovered dry-finish, I lift the skin off the loin with a sharp kitchen knife. The fat cap underneath the skin stays attached to the loin — that’s what bastes the loin during the roast. What you’re after is just the outer skin layer, in one piece if you can manage it.
2. Knife-dice the skin into rough 2cm × 2cm pieces
I cut the removed skin into roughly 2 centimetre squares — a rough dice rather than precise geometry. The size matters because every cut edge becomes fresh surface area that the rendering fat hits during the cook. Too small and the pieces dry out; too big and the deep-fry effect doesn’t reach the centre. Roughly 2cm × 2cm is the sweet spot for the bar-snack format.
A note on the tool: I use a sharp kitchen knife for this rather than scissors. The standard recipe-blog instruction is to use scissors for pork crackling, but pork loin skin is firm enough to cut cleanly with a knife. Scissors come into their own with pork belly fat, where the softer material can be tricky against a knife edge — but loin skin doesn’t need them.
3. Set up the foil-lined baking tray
I line a sturdy baking tray with aluminium foil and tip the diced skin into the tray with nothing else: no oil, no tallow, no drippings from anywhere else on the cook. The skin renders its own fat from cold over the first 20 minutes or so on the kamado, and then deep-fries in its own pooled rendered fat for the rest of the cook. Adding outside fat doesn’t improve it and complicates the cleanup.
4. Cook for 70 minutes at 140°C (parallel) or 50 minutes at 160–175°C (solo)
I sit the tray on top of the ConvEGGtor at the cook temperature. There are two valid methods depending on what else is on the kamado:
The parallel-cook setup is what I usually do. The crackling tray goes on at the same time as a whole chicken on a vertical roaster and a pork loin on the grid — all three at 140°C dome temperature for ~70 minutes. The temperature is the chicken-and-loin’s, not the crackling’s — at 140°C the crackling renders a bit more slowly than it would solo, but the trade-off is worth it for the simpler one-temperature setup. Lifting the grid to access the crackling tray on top of the deflector mid-cook would mean moving the loin and chicken too, which is the kind of faff that turns a Sunday cook into work.
The solo cook setup is hotter and faster. If the crackling is the only thing on the kamado, run 160–175°C dome temperature for about 50 minutes. The hotter setup renders faster and the deep-fry phase is more intense; the pieces come out a touch crisper.
Either way: no turning, no stirring, no checking. The cook is genuinely hands-off. Set a timer, walk away.
5. Drain on kitchen paper and salt while hot
I pull the tray off the kamado when the bite-size pieces are deep golden and firm. I tip the crackling out onto a couple of layers of kitchen paper to drain briefly, and while the pieces are still very hot I scatter over the table salt — not Maldon flakes; the smaller table-salt crystals stick to the crackling surface where the bigger flakes don’t. I mix in freshly ground black pepper if that’s how I want it that day.
6. Serve hot
Crackling is at its best within five or ten minutes of coming off the kamado, while it’s still rattling-hot. I put it in a bowl on the table alongside the rest of the cook, or hand it round with drinks before the main meal. It doesn’t keep well — soft and chewy by the next day — so cook it to be eaten the same day.
What to serve it with
The bite-size format means crackling slots into a few places. The way I serve it most often is alongside the rest of the Sunday cook — a pile of it in a bowl on the table next to the carved loin and the chicken, people help themselves with their fingers. It also works as a pre-dinner snack with drinks, sitting in a bowl on the kitchen island while you finish the rest of the cook.
If you’ve got more crackling than the room can eat, it goes brilliantly into a sandwich the next day — cold pork loin slices, mayonnaise, salad, a few pieces of cold crackling pressed in. The crackling loses its crunch overnight but the flavour is still there.
What I learned, and what I’d do differently next time
The cook method I tested ran for 90 minutes at 140°C, and what came out was head-rattle good — but the edges of the tray were ever so slightly starting to scorch by the pull point, because I hadn’t moved the pieces around during the cook. The honest correction: 90 minutes was too long. About 70 minutes at 140°C is the right number for the parallel-cook setup, OR I could have run the 90 minutes if I’d given it a single stir halfway through to redistribute the pieces. Either works. The 70-minute-no-stir option is what I’d do next time because it’s the simpler instruction.
The other thing I’d flag: I was extrapolating from domestic-oven dry-fry timing when I first projected this would take 15–20 minutes. A kamado at 140°C in a foil-lined tray is a different cooking environment from a domestic oven dry-fry — the skin sits in its own pooled rendered fat for most of the cook, which is closer to a confit-meets-shallow-fry than a dry roast. The factor-of-three difference between my projection and reality is the kind of correction that only surfaces when you actually run the cook.
The table salt over Maldon decision came out of the same kind of cook-the-thing-and-see learning. Maldon is the default British finishing-salt answer for almost everything — and on a steak or a roast potato I’d still reach for it. But the crackling surfaces are smaller and the cooled rendered fat is what the salt has to stick to. The smaller table-salt crystals embed properly; the bigger Maldon flakes sit on the surface and fall off when you pick the pieces up. Counter-intuitive, but the right call once you’ve eaten it both ways.
Variations
If you’re doing the crackling solo (not alongside a brined pork loin), you’ll need to brine the skin separately first. A 3% salt and 3% sugar brine in cold water for 12 hours — same proportions as my pork loin brine, half the duration. Then dry the skin uncovered in the fridge for 6–12 hours before dicing. The brine and dry-finish do meaningful work on the skin — without them the crackling comes out tougher and less puffed.
If you don’t have a kamado, the principle should transfer to a kettle barbecue running indirect, or even an oven at the higher 160–175°C end. I haven’t tested either yet but the underlying principle (indirect heat at moderate temperature, skin self-rendering in a foil-lined tray) shouldn’t depend on the kamado specifically. I’ll update this when I’ve actually run the cook on something else.
Related
- BGE Large pork loin recipe — the loin this skin came off, and the brine the skin shares
- Big Green Egg Large — Tested by Ben review — the kamado I cook on
- About Ben — who’s behind this
Frequently asked questions
How long do you cook pork crackling on a kamado?
Around 70 minutes at 140°C if you’re parallel-cooking with another protein at the same dome temperature (a chicken and pork loin, say). If the crackling is the only thing on the kamado, run it hotter — 160–175°C — for about 50 minutes. Either way the cook is hands-off; you don’t need to turn the pieces.
Do I need to add oil, tallow, or other fat to the tray?
No. The diced skin renders its own fat from cold over the first 20 minutes or so on the kamado, then deep-fries in its own pooled rendered fat for the rest of the cook. Nothing else goes into the tray besides the diced skin and the foil lining. Adding outside fat complicates the cleanup without improving the result.
Should I use scissors or a knife to cut the skin?
A sharp kitchen knife works fine for pork loin skin — the skin is firm enough to cut cleanly without scissors. Scissors are only worth pulling out for pork belly fat, where the softer material can be tricky against a knife edge.
What salt should I use for the finish?
Table salt, not Maldon flakes. The smaller table-salt crystals stick to the crackling surface where the bigger Maldon flakes sit on top and fall off when you pick the pieces up. This is counter-intuitive — Maldon is the default British finishing-salt answer — but on bite-size crackling the crystal size matters more than the salt brand.
How much skin do I need, and how many people does it serve?
The skin off a 1.5 kg pork loin gives roughly 200–300 g of crackling once cooked, which serves 4–6 people as a bar snack. Honest answer though: people always want more, so don’t be precious about portion sizes.
Can I do this on a kettle barbecue or in an oven instead of a kamado?
Probably yes, but I haven’t tested either yet. The principle is indirect heat at 140–175°C with the skin in a foil-lined tray rendering its own fat. A kettle barbecue with an indirect setup (coals to one side, tray on the other) should work; an oven at 160–175°C should also work, though without the kamado’s smoke you lose a layer of flavour. I’ll update this when I’ve actually run the cook on something else.
Provenance and disclosure
This recipe is sourced from a cook on 9 May 2026 on my own Big Green Egg Large. The BGE Large was a Christmas 2025 gift from my sister, originally supplied to her by Big Green Egg as part of a paid content partnership that has since ended. I own the unit outright. Smoke and Lump has no commercial relationship with Big Green Egg, and no commission, payment, or other consideration was received in connection with this recipe. The full chain of supply, and our standing affiliate-network disclosures, is on the Disclosures page.
Sourced from the 9 May 2026 cook log (cook-log-2026-05-09.md) — a three-protein cook on the BGE Large with short ribs, pork loin, chicken on a Broil King vertical roaster, and this crackling as a side.