Apple and summer berry crumble on a kamado — the dessert that goes on after every protein has come off
Published 11 June 2026 · Last updated 11 June 2026 · Tested by Ben Austen · Affiliate disclosure
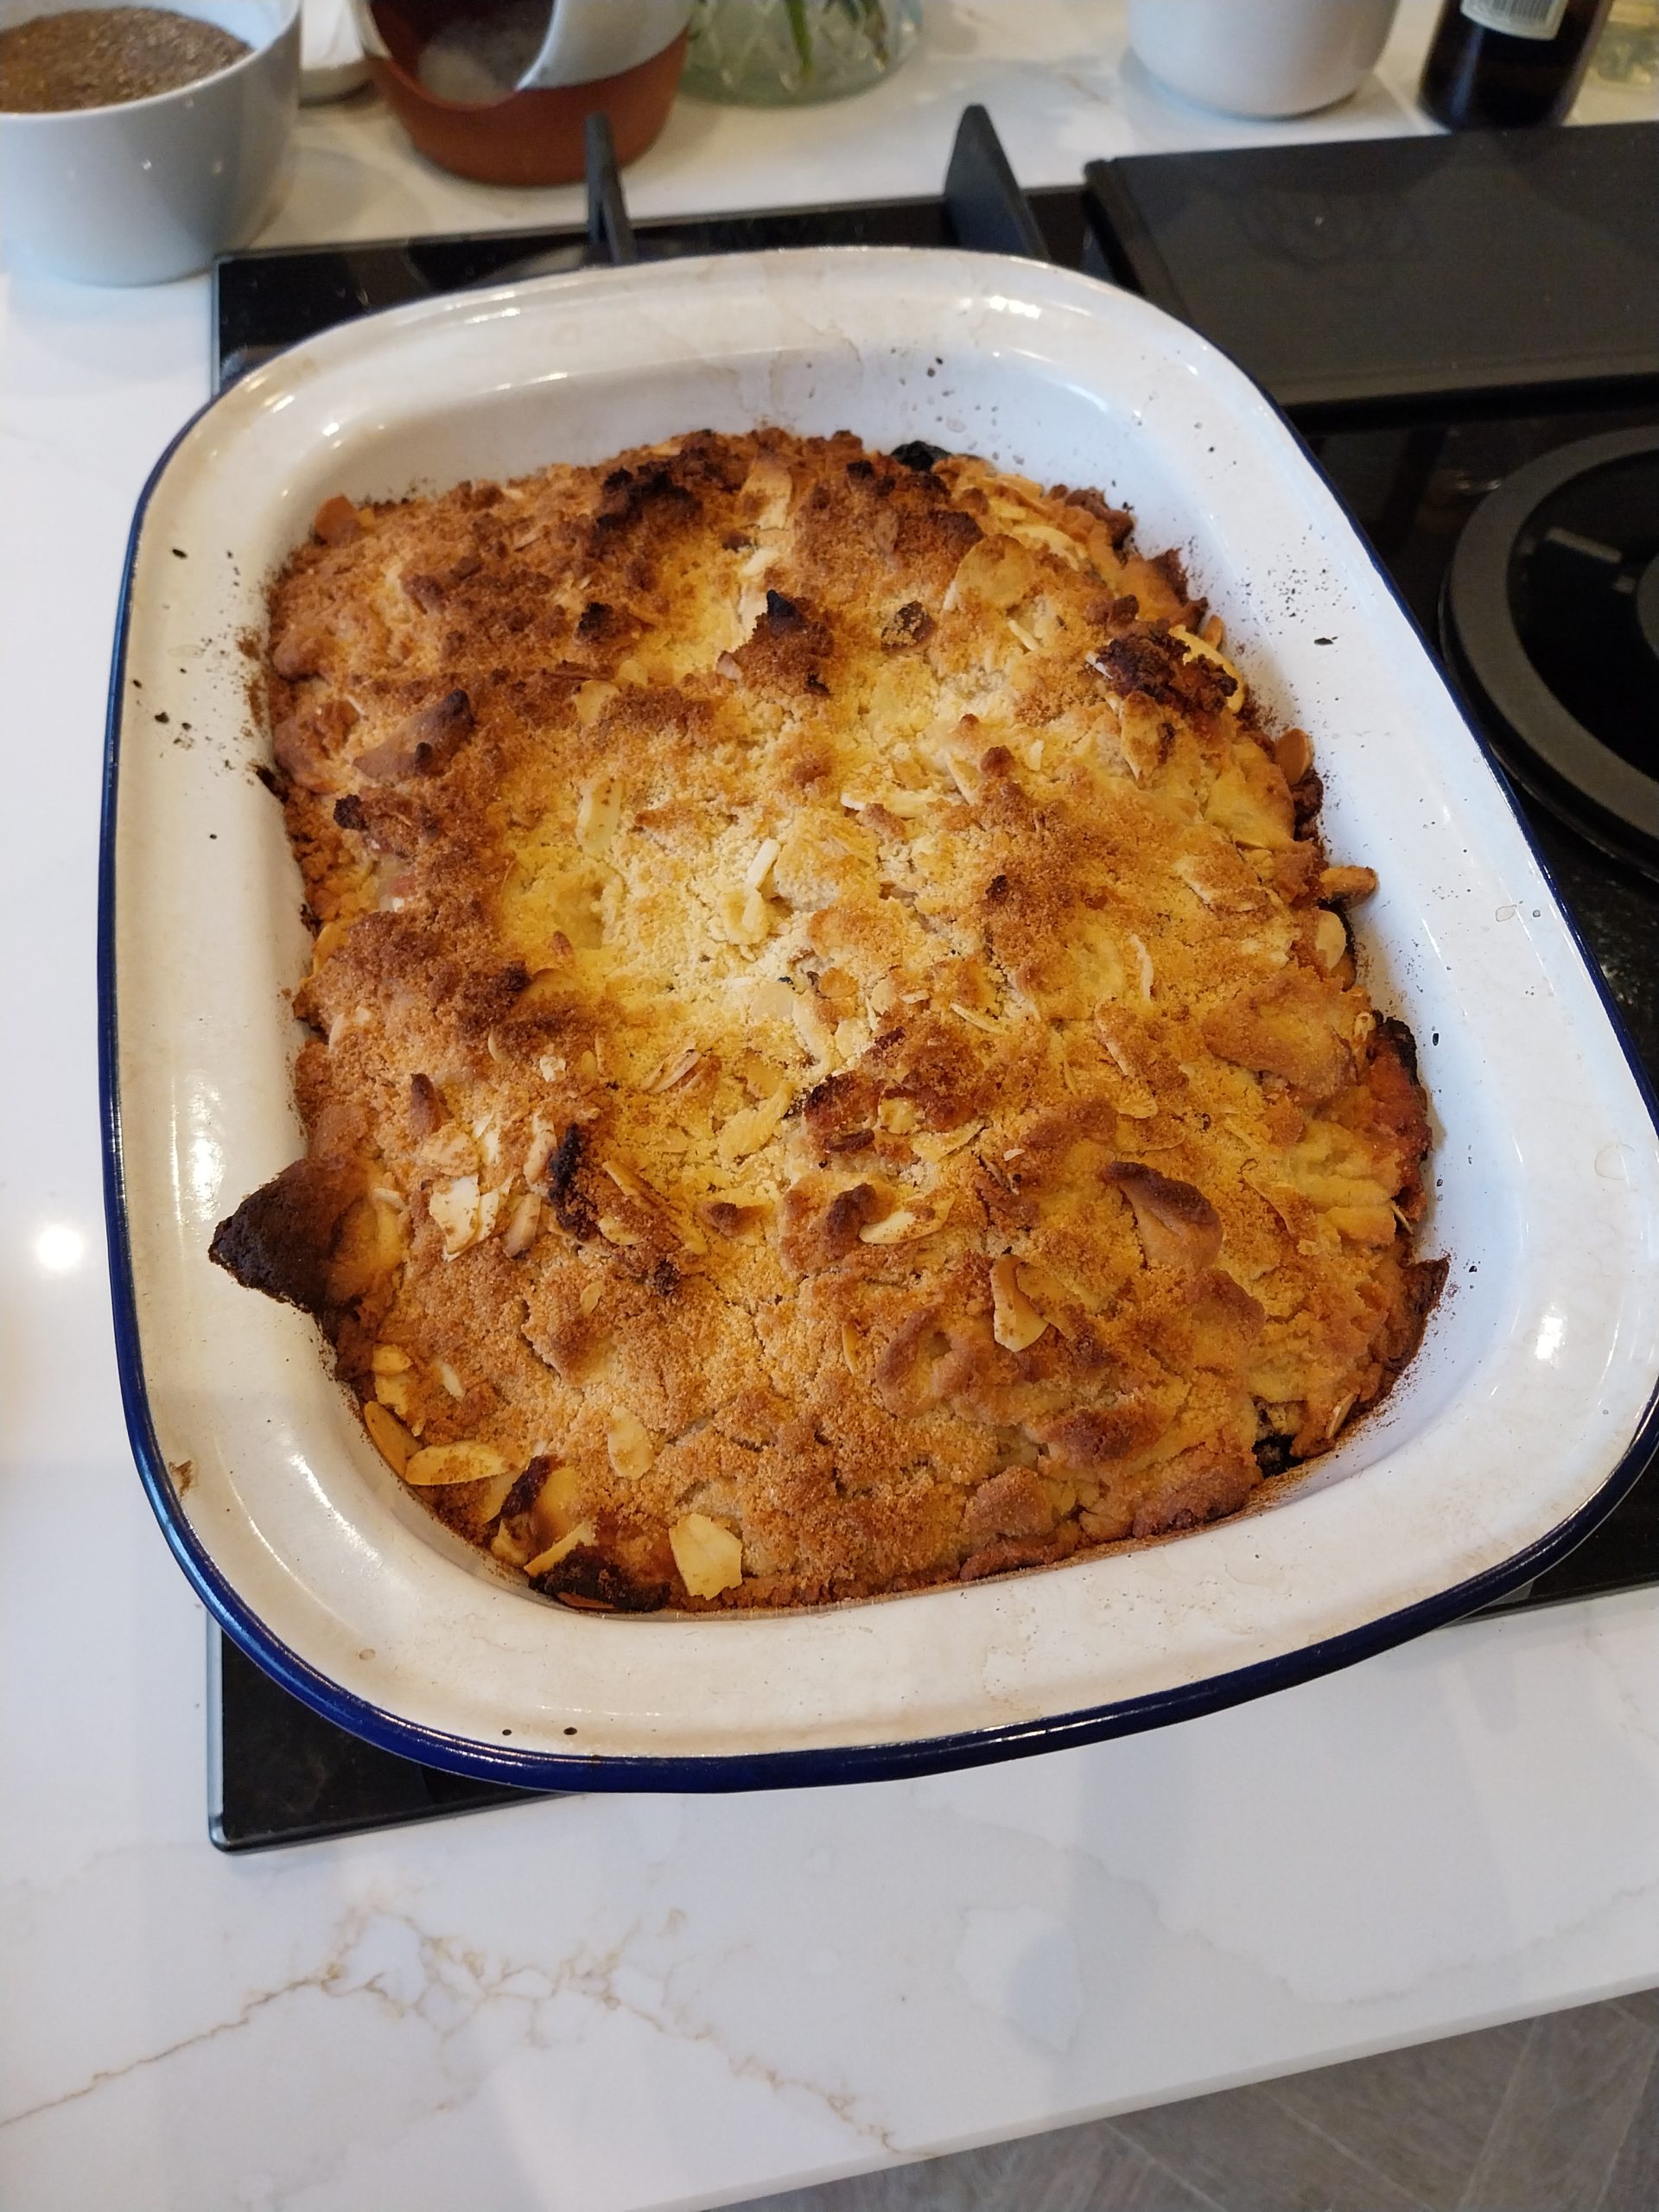
Five big Sainsbury’s cooking apples (should’ve been seven) chopped skin-on, sweated in a pan with lemon and a bit of sugar for ten minutes, half a bag of frozen summer berries tipped in, then topped with a rubbed-butter crumble built from leftover coconut flour (wrong choice; plain flour next time), brown sugar, honeycomb, and toasted almonds. Straight onto the BGE Large at 220°C dome direct, no foil cover, no fancy setup — the kamado runs as the oven for half an hour, the top goes golden, the edges bubble, and the dessert lands while the proteins are still on the rest. The 7 June cook served ten people with crème fraîche on the side. The kamado-as-oven move is the back-end-of-the-cook recipe the kit gives you for free.
Key takeaways
- The kamado is a perfectly good crumble oven — drop a ceramic baking dish straight onto the grid, run direct at 220°C dome, and you get the same golden-top-bubbling-edges crumble you’d get from your domestic oven, with the bonus of a faint residual smoke note from the lump.
- Time it for the back end of the cook. Once the proteins have come off and are resting, the kamado has hours of heat left in the ceramic and the lump. Crumble uses that heat — you’re not lighting the kit for it specifically, you’re getting a second dessert cook out of the fire you’ve already paid for.
- Five big cooking apples wasn’t enough fruit for the topping. Should have been seven. You want a cooked-down fruit layer about twice as thick as the crumble layer sitting on top of it. Mine ran the other way round because I underestimated how much five apples sweat down.
- Coconut flour is the wrong binder for a proper crumble. I used what I had — leftover from a gluten-free recipe — and the topping came out denser and cakier than a wheat-flour-rubbed-butter crumble should. Use plain flour (or a 50:50 plain-flour-and-oats mix) unless you specifically need the gluten-free angle.
- 220°C dome is the right temperature. I ran a bit hotter than that on the 7 June cook and boiled more liquid out of the fruit than I’d want, so the finish landed a touch dry. Aim 220°C, monitor by visual cues, pull at 30 minutes once the top’s properly golden and the edges are bubbling.
When to make this on the kamado vs in the oven
| You should… | If you… |
|---|---|
| Cook the crumble on the kamado (this recipe) | Already have the kamado running for a longer cook and want a second use of the same fire, are feeding 6–10 people as part of a wider table, want the faint residual smoke note from the lump, don’t mind a slightly less precise temperature control than a fan oven gives |
| Cook the crumble in a domestic oven | Aren’t running the kamado that day, want precise 180°C fan control, are making the crumble as a standalone dessert without a wider cook attached |
| Skip the cook and use a different dessert | Don’t have the apples handy, don’t have ~30 minutes spare at the end of the main cook, or are cooking for a crowd small enough that a 10-portion dessert is overkill |
The kamado-as-oven move is at its best when the dessert rides on the back of the main cook. As a standalone — light the kamado purely for a crumble — it’s not worth the 20-minute light-up time and the fuel cost compared to flicking on the domestic oven.
At a glance
| Spec | Detail |
|---|---|
| Prep time | 15 minutes (chop, sweat, build the crumble topping) |
| Cook time | ~30 minutes on the kamado |
| Total time | ~50 minutes from chop to plate |
| Servings | 8–10 with crème fraîche, depending on portion size |
| Method | Kamado, direct heat (ConvEGGtor removed) |
| Temperature | 220°C dome direct |
| Difficulty | Easy |
| Equipment | Kamado, sturdy ceramic baking dish, pan for the apples, knife, spoon, oven gloves |
| Cuisine | British |
What you’ll need
Equipment
- A kamado-style barbecue. I cook this on my Big Green Egg Large; any 46cm-class ceramic kamado that can run direct over lit lump will work the same way. The recipe assumes the kamado is already running from a longer cook that’s just finished (in my case, the bone-in pork loin and smoked sausages had come off before the crumble went on).
- A sturdy ceramic baking dish. Mine is a 26 × 20 cm white-with-blue-trim ceramic — exactly the kind of dish you’d use in a domestic oven. Pyrex glass, Le Creuset stoneware, or any oven-safe ceramic baking dish works. Avoid thin metal trays — they’ll over-conduct the direct heat and scorch the crumble base. Avoid plastic or anything not oven-safe (the dome temperature is higher than most fridges-and-freezers plastic survives).
- A pan with a lid for sweating the apples down.
- A knife and chopping board.
- Oven gloves — the dish coming off the kamado is properly hot.
Ingredients
For the fruit base:
- 7 large Bramley or other cooking apples (Sainsbury’s basic cooking apples are what I used). I underestimated and used only 5 on the 7 June cook — should have been 7 to land the right fruit-to-topping ratio. Skin on, just core them. Chop into roughly 2cm chunks.
- Juice and zest of half a lemon. Stops the apples going brown while you chop, brings a sharp note that lifts the sweetness of the cooked-down fruit.
- 2 tablespoons caster sugar for sweating the apples (cooking apples are sharp; you need a small bit of sugar to balance even before the crumble topping goes on).
- 250 g frozen summer berries (about half a standard supermarket bag — Sainsbury’s, Tesco, Aldi all stock the same kind of frozen-fruit mix). Raspberries, blackberries, blueberries, redcurrants — whatever’s in the bag.
For the crumble topping:
- 150 g plain flour. I used coconut flour on the 7 June cook because I had it lying around from a gluten-free recipe. Coconut flour absorbs more liquid than plain flour and the topping landed denser and cakier; plain flour next time. If you specifically want a gluten-free crumble, ground almonds or a 50:50 ground-almond-and-oat mix beats coconut flour for crumble texture.
- 100 g cold butter, cubed. Cold matters — warm butter blends into the flour rather than rubbing into pea-sized lumps, which is what you want for the crumble texture.
- 75 g brown sugar. Light or dark muscovado both work. Dark gives a slightly deeper note; light is finer-grained and rubs in cleaner.
- 2 tablespoons honeycomb (with the honey) broken into small pieces. Adds a layer of flavour you don’t get from sugar alone — the cooked honeycomb tips toward a caramel-toffee note.
- 50 g toasted flaked almonds. Toast them in a dry pan for 2–3 minutes before adding to the topping — it intensifies the nutty note and helps them keep their crunch after baking.
No spice. No cinnamon, no mixed spice. The fruit and the honeycomb carry the flavour; spice would crowd them. Add a pinch of ground cinnamon if you specifically want the classic apple-crumble spice note, but the recipe stands without it.
The cook method
1. Chop the apples skin-on
Quarter each apple, cut out the core, chop the rest into roughly 2cm chunks. Don’t peel — the skin softens fully during the sweat-down and the cook, and you save the time and the inevitable waste-pile of apple peels. Toss the chopped apples in the lemon juice and zest in the pan as you go to stop them browning.
2. Sweat the apples down
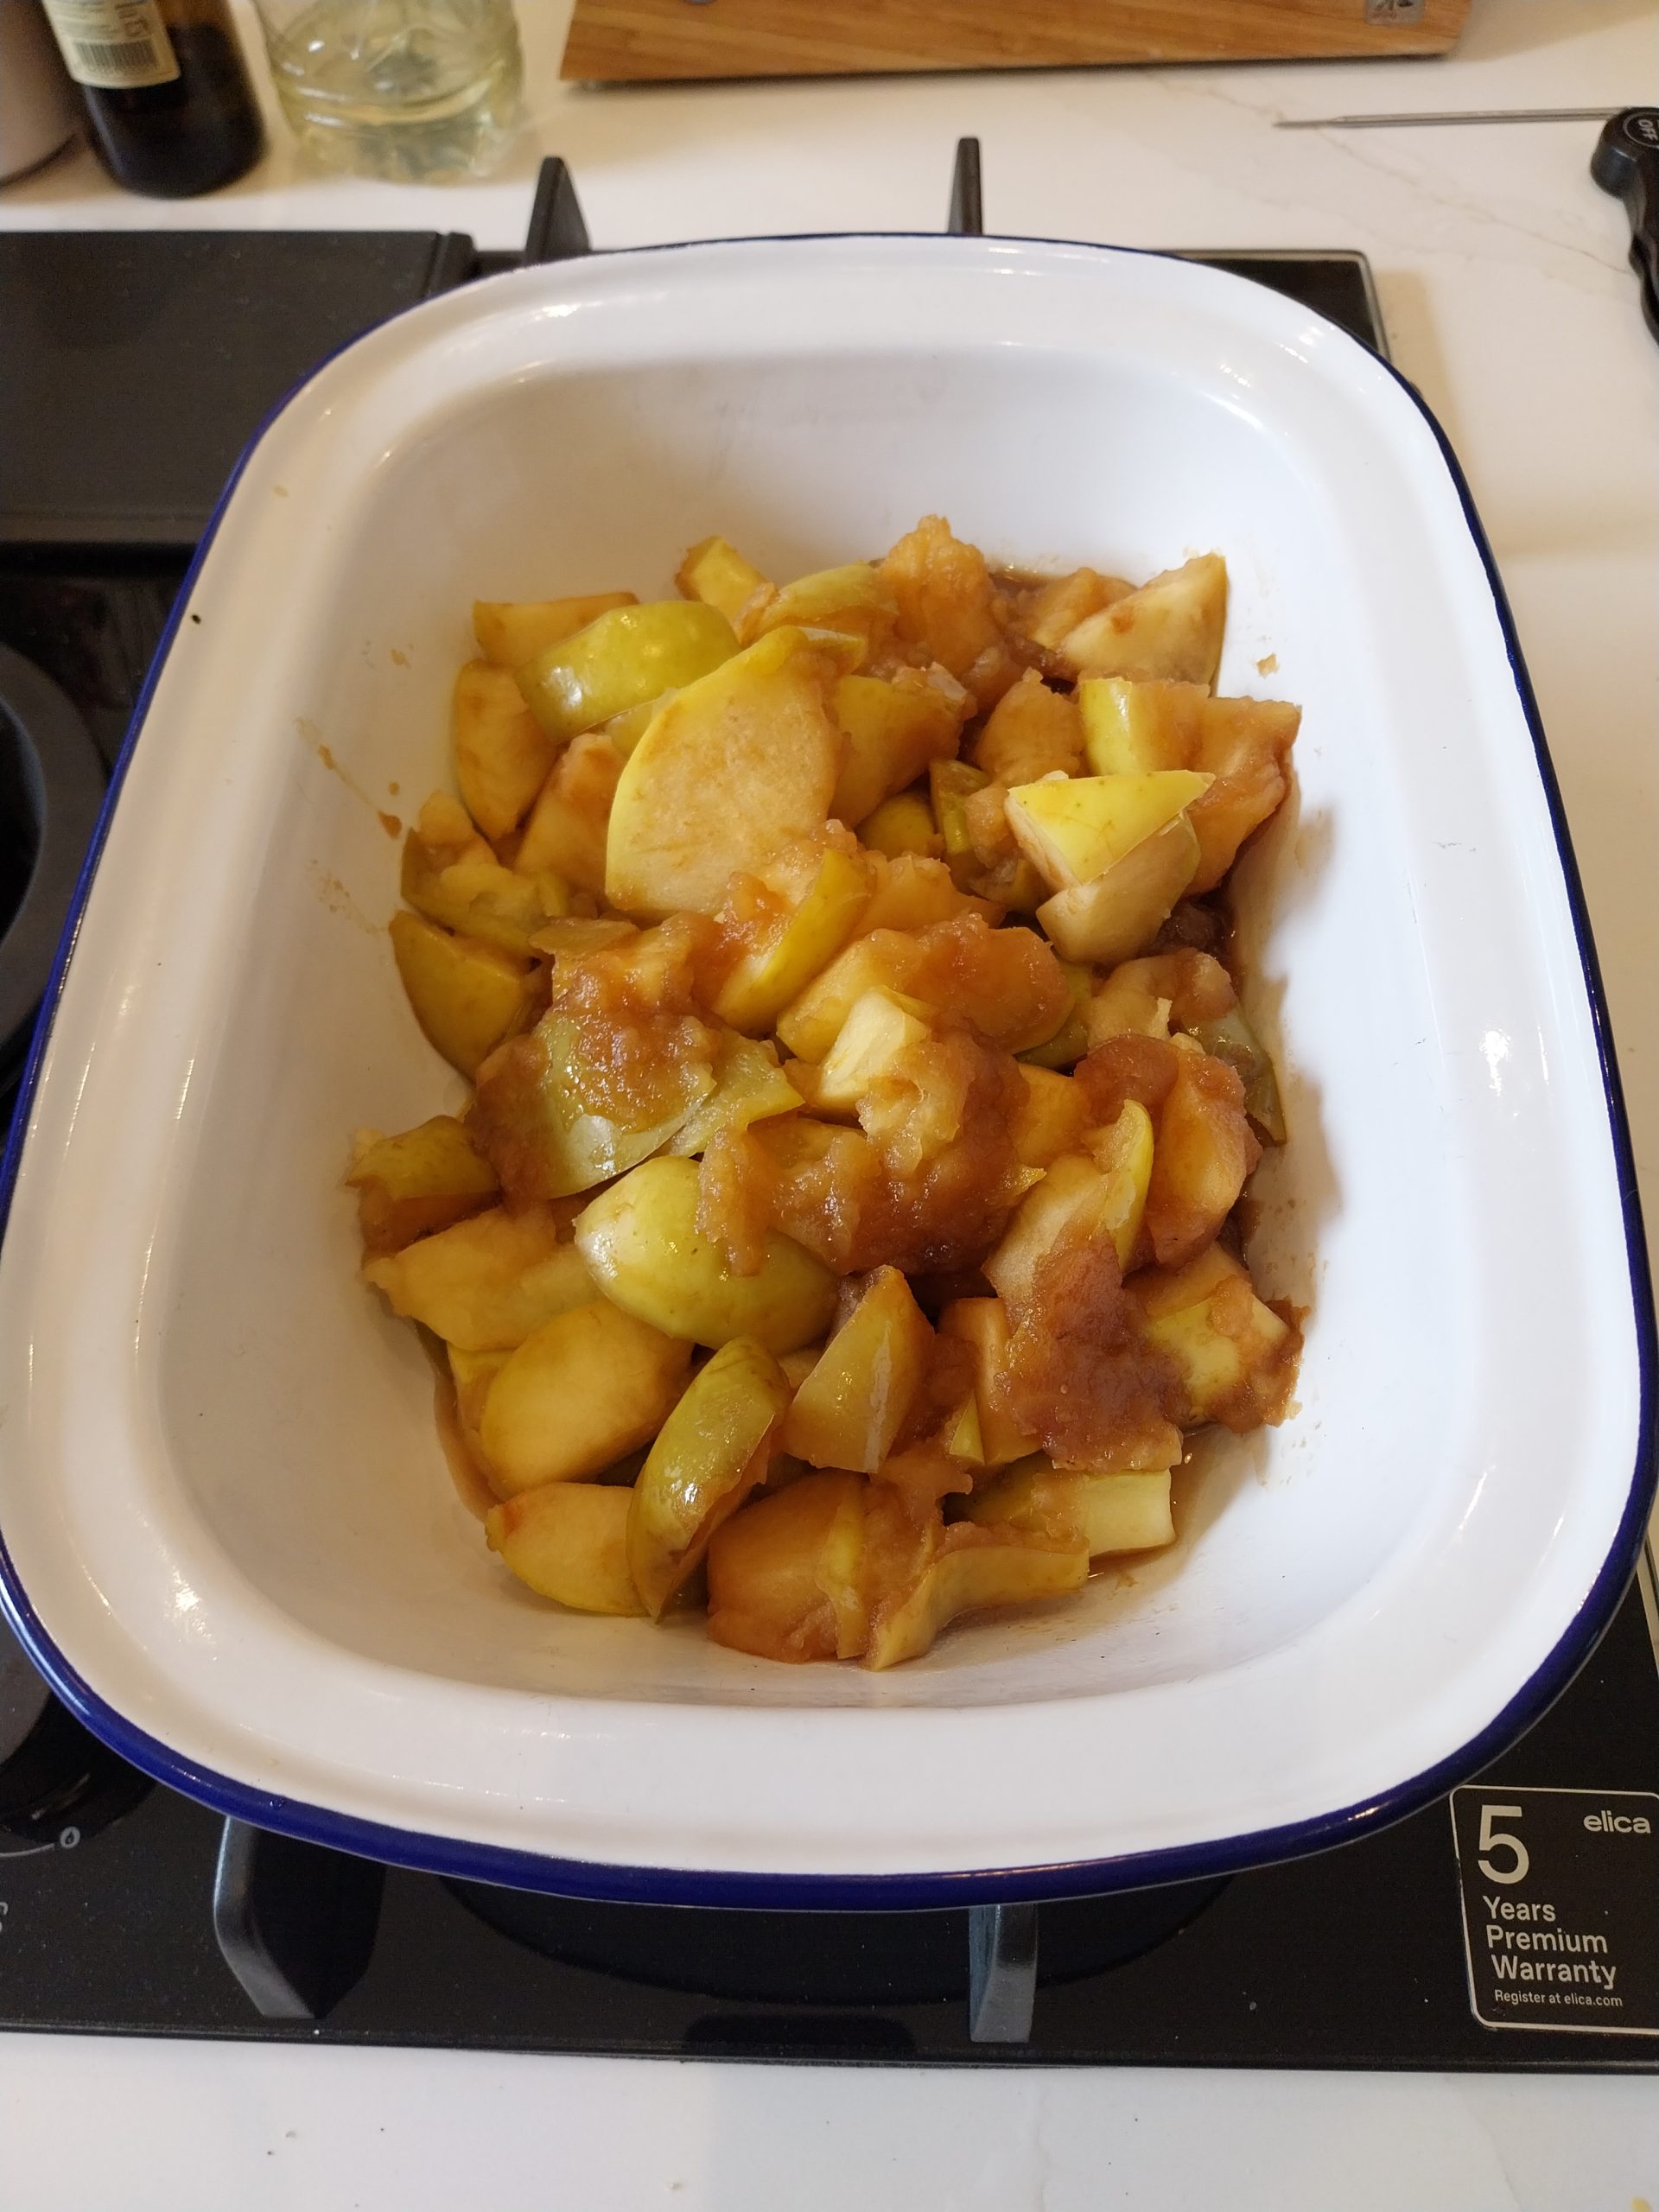
Add the caster sugar to the pan, put the lid on, set over a medium-low heat for ten minutes. Stir once or twice. The apples release water, soften, and start to break down into a coarse compote. They don’t need to be completely smooth — you want some chunks holding their shape for the texture of the finished crumble. After ten minutes, take the lid off, add the frozen berries straight in (no need to defrost), stir, and cook for another two or three minutes to bring the berries up to temperature and let some of the berry juice mix into the apple.
3. Build the crumble topping
In a wide bowl, add the flour, brown sugar, and cubed cold butter. Rub the butter into the flour with your fingertips until the mixture looks like coarse breadcrumbs with a few pea-sized lumps — those bigger lumps become the crunchier bits in the finished topping. Scatter the broken honeycomb pieces and the toasted flaked almonds through the mixture. Don’t over-mix — light hands keep the texture loose, which is what you want.
4. Tip the fruit into a ceramic baking dish
Pour the sweated apple-and-berry mixture into the 26 × 20 cm ceramic baking dish — should give you a fruit layer roughly 3–4 cm deep. If yours runs lighter than that (as mine did on the 7 June cook), the topping will dominate the finished dessert. Aim for the fruit to come about two-thirds up the side of the dish.
5. Scatter the crumble topping evenly across the fruit
Spread the crumble mix over the fruit in an even layer, covering the whole surface. Don’t press it down — keep it light and crumbly so the texture stays airy. Some of the crumble will sink into the fruit at the edges; that’s fine, it gives you the bubbling-edges effect that’s the visual marker of a properly-cooked crumble.
6. Onto the kamado, direct, 220°C dome, no foil
Pull the ConvEGGtor off the kamado (the protein cooks earlier in the day used it; the crumble goes direct over the lit lump). Drop the grid down and sit the baking dish straight in the middle of the grate. Aim 220°C dome. I ran a bit hotter than that on the 7 June cook and the finish landed slightly dry. Close the lid. No foil cover, no shielding — direct heat from below, dome-radiated heat from above, the crumble bakes the same way it would in a fan oven.
7. Thirty minutes, visual cues
The crumble runs about thirty minutes at 220°C dome. There’s no probe to read — the cook is visual:
- The edges should be bubbling — the fruit juice is hot enough to push up through the topping at the edges of the dish.
- The top should be golden — not pale (under-baked) and not dark brown (heading toward burnt).
- The toasted almonds should be a shade darker than when they went on but not blackened.
Open the dome once at the twenty-minute mark to check the top colour. If it’s already golden, the cook’s done. If still pale, give it another five to ten minutes and check again.
8. Off the kamado, rest five minutes, serve
Pull the dish off with oven gloves — it’s properly hot — and sit it on a heatproof board or trivet for five minutes. The fruit settles, the edges stop bubbling, the crumble crisps up as the steam stops rising through it. Serve straight from the dish with a spoon, scooped into bowls.
What to serve it with
I served the 7 June crumble with crème fraîche — the sharpness cuts the sweetness of the fruit-and-honeycomb topping in a way that vanilla ice cream or thick double cream can’t. Crème fraîche is the move I’d reach for again.
Alternatives worth keeping in mind:
- Vanilla ice cream — classic pairing; the temperature contrast against the hot crumble is the textbook move. Tip toward a higher-fat ice cream (Häagen-Dazs, Mackie’s, supermarket premium) — cheaper supermarket vanilla ice cream is too sweet and the sugar level overwhelms the dessert.
- Custard — proper Bird’s or homemade. Custard reads as the British-pub-pudding move; works against the apple but slightly buries the berry component.
- Plain thick double cream — straightforward, classic. Lets the fruit do the talking. Works if you’ve used a sharper apple variety.
Bread alongside? No — this is a dessert, not a course. Glass of port or a sweet white (Sauternes, Moscato d’Asti, late-harvest Riesling) if you want a wine match; English sparkling rosé works surprisingly well against the berry component.
What I learned, and what I’d do differently next time
Three honest corrections came out of the 7 June cook — none of which stopped the dessert being good, but each of which would have made it better.
One: I should have used seven apples, not five. I underestimated how much the fruit sweats down. Five large cooking apples reduced to a fruit layer about 2 cm deep in the dish, which the topping then dominated. Seven apples gives you a 3–4 cm fruit layer with the crumble sitting proportionally on top of it. The cooked weight matters more than the raw weight here; cooking apples lose 30–40% of their volume in the sweat-down.
Two: I ran the kamado a touch too hot. I was aiming roughly 220°C dome but the actual hold drifted closer to 240–250°C by the time I’d checked. The fruit boiled out more liquid than I’d want and the finish landed slightly drier and cakier than a properly-balanced crumble. Domestic ovens for crumble are typically 180°C fan / 200°C non-fan; the kamado at 220°C dome direct is roughly equivalent. Above 240°C is pizza territory and slightly too hot for a thirty-minute crumble bake. Next time I’d nail 220°C and slow the cook to thirty-five minutes if needed.
Three: coconut flour is the wrong binder. I used what I had — leftover from a gluten-free recipe earlier in the week. Coconut flour absorbs liquid more aggressively than plain flour, doesn’t form the pea-sized rubbed-butter lumps you want, and the finished topping landed denser and cakier rather than light and crumbly. Plain flour is the right choice unless the gluten-free angle is non-negotiable; in which case, ground almonds (or a 50:50 ground-almond-and-oat mix) gives a much better gluten-free crumble texture than coconut flour does. The 7 June cook’s “slightly cakey” finish was probably 60% the coconut flour and 40% the temperature.
I’d cook this again the Sunday after next with the three changes above, and expect a cleaner finish.
Variations
On a kettle barbecue or a pellet smoker. The principle is the same — direct heat at ~200°C dome, ceramic baking dish, ~30 minutes, visual cues. A Weber kettle running indirect with the lid closed should hit similar timing; a pellet smoker running at 200°C is genuinely identical to an oven for this kind of bake (the smoke note is fainter than from a kamado over lump). I haven’t tested either; I’ll update this section when I do.
In a domestic oven. 180°C fan / 200°C non-fan, same dish, same 30 minutes. You lose the residual-smoke note from the lump but gain precise temperature control. If you’re not running the kamado that day, the domestic oven is the right tool.
With different fruit. Plums + raspberries works beautifully in late summer (skin-on stone-out plum halves, ~2cm chunks). Pears + blackberries in autumn (pears need slightly less sweat-down time than apples). Rhubarb + strawberry in late spring (more sugar in the sweat-down — rhubarb is sharper than apple). Any fruit-plus-berry combination follows the same pattern: sweat the firm fruit down with a bit of sugar and citrus, add the berries at the end of the sweat, top, bake.
Gluten-free properly. Skip the coconut flour mistake — use ground almonds + jumbo oats (gluten-free certified if needed) in a 50:50 mix instead of plain flour. The texture lands closer to a granola-topped fruit bake than a true rubbed-butter crumble, but it’s a clean gluten-free finish.
Vegan. Swap butter for cold cubed coconut oil or vegan block butter; the rubbed-in lumps work the same way. Brown sugar and flour are already vegan. Replace honeycomb with dried apricot or chopped dates.
Related
- Bone-in pork loin on the BGE Large — the centrepiece of the 7 June cook; the crumble rode on the back of the fire that had been running for the pork
- Lamb rump on the BGE Large — same kit pattern (direct after indirect), different cut, different course
- Big Green Egg Large — Tested by Ben review — the kamado all of these cooks happen on
- About Ben — who’s behind this
Frequently asked questions
Can I cook a crumble on a kamado?
Yes — the kamado at 220°C dome direct works as a fan oven would. Drop a ceramic baking dish straight onto the grid, no foil, no shielding, ~30 minutes. The advantage over a domestic oven is the residual-smoke note from the lump and the second-use-of-the-fire economics if you’re already running the kamado for a protein cook. The disadvantage is slightly less precise temperature control.
What temperature should I run the kamado at for a crumble?
Aim 220°C dome direct, ConvEGGtor removed. I ran a bit hotter than that on the cook this recipe is sourced from — closer to 240–250°C by the time I’d checked — and the fruit boiled out more liquid than I’d want, leaving the finish slightly dry. 220°C is the target; above 240°C the topping browns before the fruit’s cooked through.
Do I need a special baking dish for a kamado crumble?
Any oven-safe ceramic or Pyrex baking dish works. A 26 × 20 cm ceramic dish gives the right fruit-and-topping depth for a 7-apple recipe. Avoid thin metal trays — they over-conduct the direct heat and scorch the crumble base. Avoid anything not rated for 200°C+ dome temperatures. The dish should also have a flat base so it sits stably on the grid.
Can I use coconut flour instead of plain flour for the crumble topping?
Technically yes, but the texture is worse — coconut flour is more absorbent than plain flour and the topping lands denser and cakier rather than light and crumbly. If you need a gluten-free crumble, a 50:50 ground-almond-and-jumbo-oat mix gives a much better texture than coconut flour does. I used coconut flour on the cook this recipe is sourced from because I had it leftover, and it was the single biggest thing I’d change next time.
How long does a crumble take on a kamado?
About 30 minutes at 220°C dome direct, judged by visual cues rather than a timer alone. The cook is done when the edges are bubbling, the top is golden (not pale, not dark), and the toasted almonds are a shade darker than when they went on. Open the dome once at 20 minutes to check the colour; if golden already, pull early. If pale, give it another 5–10 minutes.
Does the crumble pick up smoke flavour from the kamado?
A faint background note, yes — particularly if you’ve had wood chunks on the lump earlier in the cook session. It’s subtle: not a smoke-bombed dessert, just a hint of warmth that you wouldn’t get from a domestic oven. If you specifically want a stronger smoke note, add a small chunk of fruitwood (apple, cherry) to the lump before the crumble goes on. If you’d rather no smoke at all, cook it after the wood chunks have burned off — the residual lump alone leaves only the faintest hint.
Provenance and disclosure
This recipe is sourced from a single cook on my own Big Green Egg Large — Sunday 7 June 2026, run as the dessert at the back end of a longer cook day that included the bone-in pork loin as the centrepiece and smoked sausages alongside. The kamado had been running for around four hours by the time the crumble went on; the proteins had come off and were resting; the lump had plenty of heat left and the dome held 220°C direct without effort.
The dessert served ten people at the table with crème fraîche on the side. Three honest corrections came out of the cook — apple count low, temperature high, wrong flour for the binder — none of which stopped it being good, all of which would have made it better.
The BGE Large was a Christmas 2025 gift from my sister, originally supplied to her by Big Green Egg as part of a paid content partnership that has since ended. I own the unit outright. Smoke and Lump has no commercial relationship with Big Green Egg, and no commission, payment, or other consideration was received in connection with this recipe. The full chain of supply and our standing affiliate-network disclosures are on the Disclosures page.
This is a one-cook recipe. The three corrections above are what I’d change on cook two; the rest of the method I’d run unchanged. When the second cook happens this piece gets updated with the new findings.
Sourced from the 7 June 2026 cook log — the multi-protein Sunday cook on the BGE Large (bone-in pork loin, smoked sausages, this crumble for dessert).